Check out our White Paper Series!
A complete library of helpful advice and survival guides for every aspect of system monitoring and control.
1-800-693-0351
Have a specific question? Ask our team of expert engineers and get a specific answer!
Sign up for the next DPS Factory Training!
Whether you're new to our equipment or you've used it for years, DPS factory training is the best way to get more from your monitoring.
Reserve Your Seat TodayNot everyone has the luxury of a permanently manned 24-hour NOC. But if you've got a TMon/IAM system, you already have a more effective solution for 24-7 monitoring - pager and email alarm notifications.
Paging and email take network alarm monitoring out of the NOC to wherever you are - your car, your remote sites, and even your home. You'll have total assurance that you'll be notified if problems happen at any time. You can keep your field techs out in the field, dramatically reducing windshield time. Email notifications even create an automatic alarm history record.
Pager and email support is a standard feature on TMon. You can notify up to 999 users when any alarm sets or clears. Alarms can be acknowledged or tagged by two-way paging or email relay. TMon's automatic escalation ensures that supervisors are notified if a tech doesn't acknowledge a page.
Here's some easy steps for getting 24-hour alarm notifications up and running today:
Step One
Define and Configure Your Ports
Go to Master Menu > Parameters > Remote Ports.
From the Remote Parameters screen you want to find the port that has the 212 modem ( Usually port 4). If you are going to use email paging you want to find two-halted job ports above job 48.
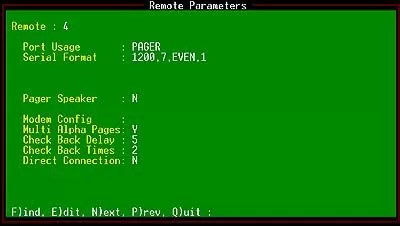
On port 4 Choose E)dit - this will put you in Edit Mode. Set Port usage as Pager. Serial Format default settings are 1200, 7, E, 1. Make sure Multi Alpha Pages is set to Yes. This will prevent the system from hanging up and calling the paging terminal if sending a page to more than one technician.
Note : If your paging terminal connects at 9600 baud, then use an external modem on one of your RS232 ports. Your paging company should have the relevant information regarding your equipment.
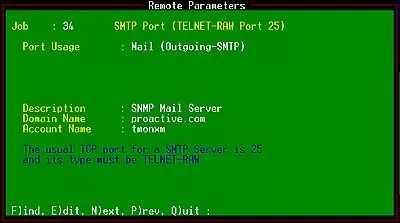
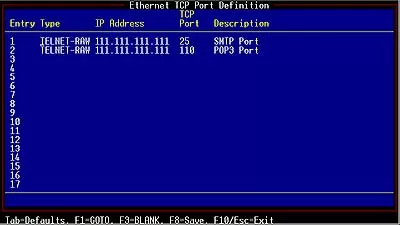
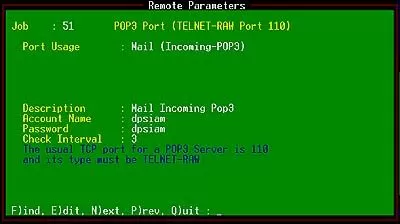
For email paging you will have to set up two jobs: one outgoing (SMTP), and one incoming (POP3). (To complete this step you will need to contact your Network Administrator for your account name and password).
Exit to the Files menu.
Step Two
Configure Pager Carriers
Choose Pager > Pager Carriers.
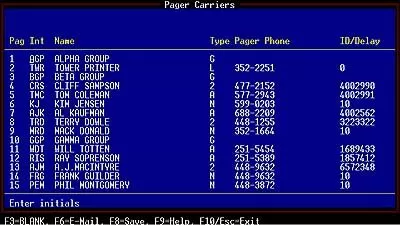
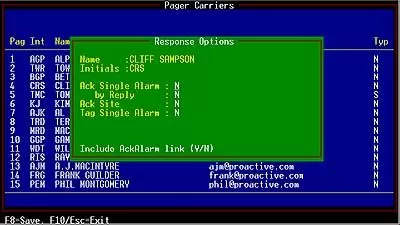
For email notification, press the F1 for response options. You can set up a user to acknowledge alarms, site, or tag alarms.
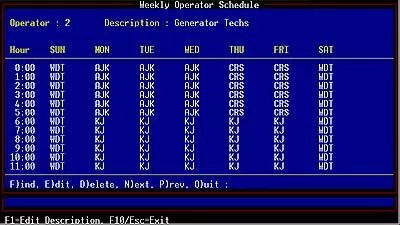
Go to Pager > Weekly Schedules. Enter the operator number that you want assigned to the technician. Fill in the Description (Use technicians' name). Press F3 to go to the Fill screen and fill in the day of the week and time that the technician should be paged. Type F)ind to find the next operator number (1-999) to assign for the next technician. To change the on-call tech press F4.
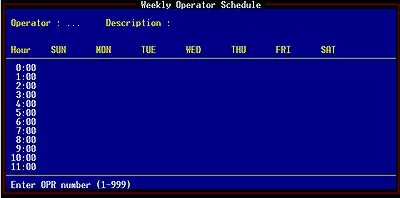
Assign operator number for technician
Page on-call 24x7
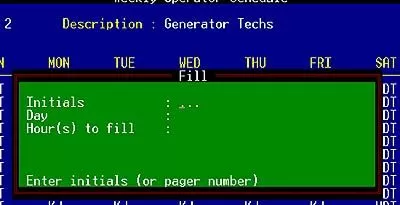
Press F3 to fill in operator schedule
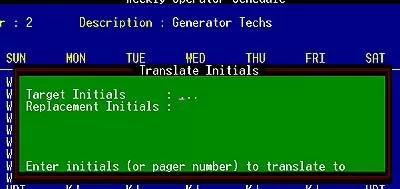
Press F4 to change on-call schedule
Step Three
Configure Pager Messages
Exit to Pager > Alphanumeric Formats > Format 1. Enter the alarm format that will be displayed on the pager. Use the TAB key to move between fields.
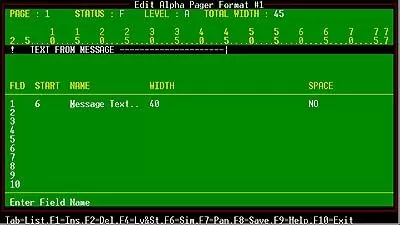
Note : You have 4 formats that can be used, but format 1 is recommended.
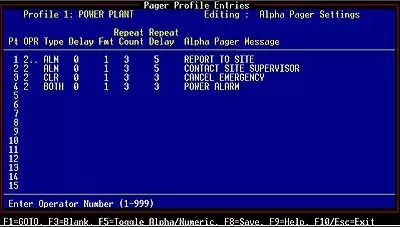
Exit to Pager > Profiles. Enter Profile description.
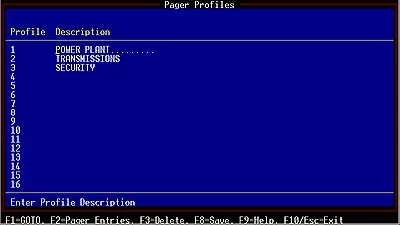
Press F2 to go to the Profile Entries. Use TAB key to edit pager settings.
Step Four
Attaching A Profile Number to Databased Alarm Points
Now that all the profiles have been created, attach the profile number to the alarm points that have been databased in your system.
Example for adding a profile to a NetGuardian.
Go to Exit > Files > LAN-base Remotes

Shortcut: By pressing the Ctrl+Page Down keys this will take you down to the next point without having to enter through all the fields. Or the F5=Range. (See appendix H in Tmon/Iam manual for shortcuts).
Exit to Master > Initialize > Monitor
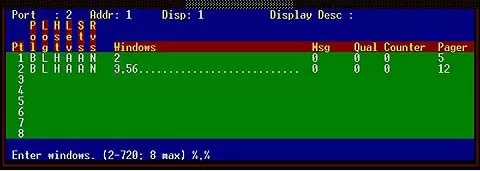
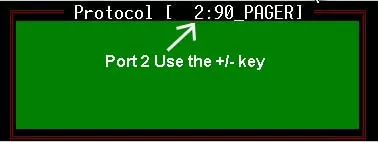
To verify that the pager and email are working, at the Alarm Summary screen move your cursor to an empty window. For the Pager, press Alt+F8 to bring up the Protocol Analyzer. For email, press Alt+F5 to bring up the English Analyzer. Use the +/- key to move to the pager port or outgoing (SMTP). For the Protocol Analyzer press the space bar.
Press the letter A to put the protocol in ASCII mode ( Do Not Do This Step For The Alt+F5 command ). Press Enter to get into the Standing Alarm screen. Press the Space Bar and the letter B to expand the protocol window.
Pager: Alt+F8
email: Alt+F5

Run T/Windows software.
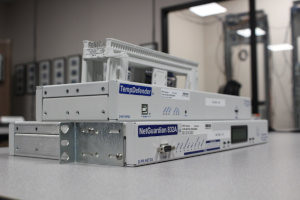
Secure Your Network with the New IAM-6
If you want to protect your network against the dangers of service outages and equipment loss, check out the new IAM-6. It's 2-6 times faster than the IAM-5 and fully compatible with your existing IAM/TMonXM software and database.
At DPS Telecom, we've always been committed to providing strong, reliable solutions that empower our clients with unmatched network visibility. Now, with the introduction of the T/Mon LNX, we're taking alarm notification capabilities to an entirely new level.
The T/Mon LNX retains all the trusted features of previous T/Mon models - including comprehensive pager and email notification capabilities - while introducing enhanced performance and user-friendly advancements:
While previous systems like the T/Mon NOC haven proven to be reliable workhorses, the LNX introduces capabilities designed to handle the demands of modern, distributed networks:
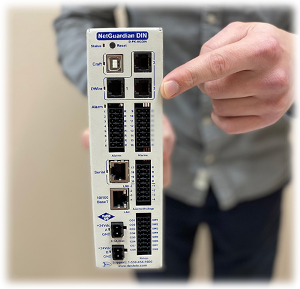
Upgrading to the T/Mon LNX doesn't mean starting over. It remains fully compatible with all existing DPS RTUs and legacy configurations. Your investment in current equipment, like the NetGuardian series, is preserved while gaining access to the latest T/Mon capabilities.
If you're ready to simplify your network management and enhance your alarm notification capabilities, the T/Mon LNX is your solution. With its advanced features and proven reliability, it makes sure you stay connected to your network - wherever you are.
Contact us today at 1-800-622-3314 or email sales@dpstele.com to learn more about upgrading to the T/Mon LNX and experiencing its benefits firsthand.