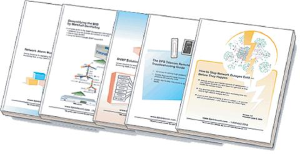
Check out our White Paper Series!
A complete library of helpful advice and survival guides for every aspect of system monitoring and control.
1-800-693-0351
Have a specific question? Ask our team of expert engineers and get a specific answer!
Sign up for the next DPS Factory Training!
Whether you're new to our equipment or you've used it for years, DPS factory training is the best way to get more from your monitoring.
Reserve Your Seat TodayOne of the best practices to have an efficient remote monitoring system is a competent master station. Especially if you have a large number of remote sites in multiple different distant locations, you need to be able to rely on your master station for complete visibility.
As remote monitoring experts, we know exactly how important our devices are and how reliable they need to be. So, our T/Mon alarm master is designed to give you the best situational awareness possible and the T/Mon GFX is the key to that.
T/Mon GFX is an intuitive network visibility experience. This powerful interface provides a tgraphical alarm presentation using images of maps, floor plans, and other graphical representations that give operators and technicians visibility of the entire network.
This interface is more than just a bird's eye view of your network, though. With GFX, you can add multiple layers, for example, cascading through national, regional, local, and even a rack presentation of your equipment.
This intuitive view is great for visually aiding you to make smarter dispatch decisions, saving you both time and money from needless truck rolls and windshield time.
In this article, we will cover the basics and best practices of the following:
To start using T/Mon GFX and building profiles, first navigate to your T/Mon's IP address in the browser of your choice. You'll want to login to "Edit" as a user with elevated permissions.
Note: if you're unfamiliar with navigating your T/Mon's web interface, don't worry! You can easily get back into monitor mode at any time.
Once at the edit screen, navigate to "GFX" using the left-hand menu.
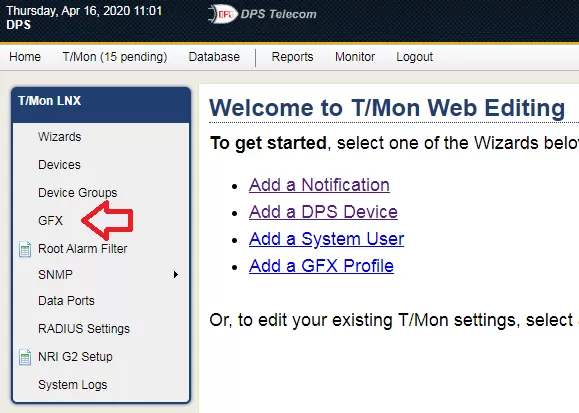
In order to use GFX, ther must be at least one GFX profile created. Creating profiles is a very simple process. In the "Select a GFX Profile" dropdown, select the option labeled "New Profile Entry". Go ahead and give this profile a name and it will create the profile with a top node and will automatically assign the profile to the currently logged in user.
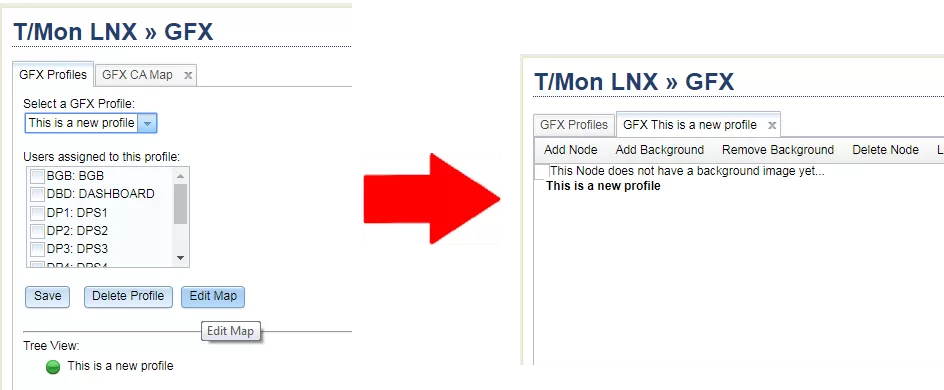
Selecting from a pre-existing profile is the same process. Using the "Select a GFX Profile" again, simply choose a pre-existing profile from the list.
With the new profile created or existing profile selected, a "Tree View" section becomes visible beneath the dropdown. You cna click any of these nmomdes to get to the direct lcoation of the map. However, if the node selected is not a map node, it will open to the parent node instead. You can configure the map iteself by clicking the button labeled "Edit Map" to open the map view.
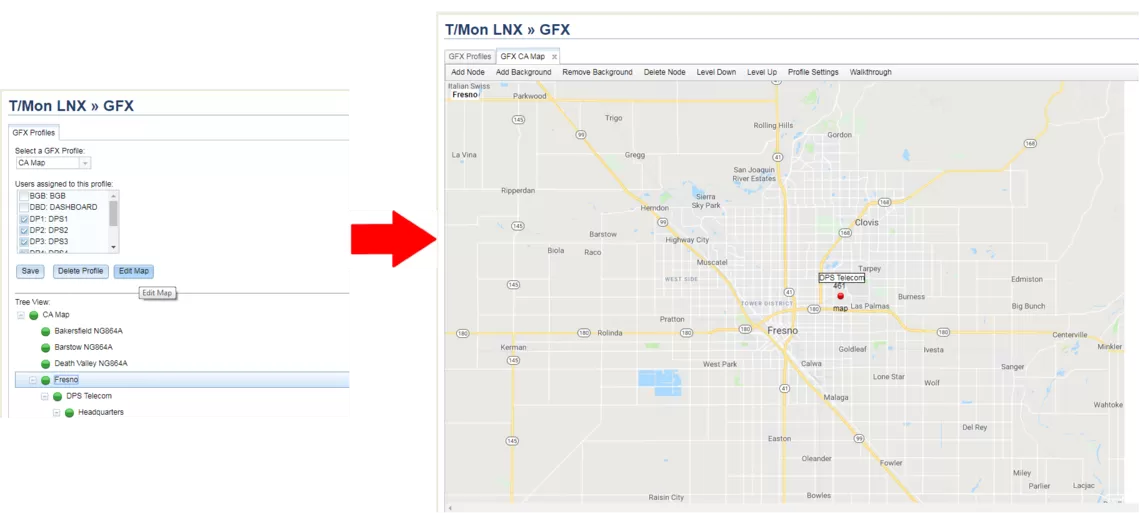
Users can be assigned to GFX profiles. By default, the user that creates the GFX profile will be assigned to that profile. In the GFX Profile selection screen, you can toggle which users should be assigned to a particular map. When you're happy with the changes, simply click "Save".
Note: At this time, only one GFX profile can be viewed on the monitoring screen. If a user is seeing a different GFX profile in monitor mode, they are most likely assigned to multiple GFX profiles. To prevent this, unassign any users that belong to unnecessary profiles, ensuring they're assigned to the correct profile only. Once the corection is made refreshing the monitor mode page will reload the newly assigned profile.
At the top of the map view, there's a button labeled "Walkthrough". This option guides you through the basics of adding nodes and backgrounds. Using this feature is a great way to quickly get started as most of the information necessary to complete a GFX profile is provided by the Walkthrough.
The basic steps are as follows:
| Option | Description |
|---|---|
| Add Node | Adds a new node to the current map layer |
| Add Background | Adds a background to the current map layer from an existing background or a newly uploaded background. |
| Remove Background | Removes the background image from the current map layer (the image is not removed from the system). |
| Delete Node | Deletes the selected node from the current map layer. |
| Level Down | Traverses to the map layer of the selected node. |
| Level Up | Traverses up a map layer to the parent node. |
| Profile Settings | Adjustable settings for the GFX profile. More information below. |
| Walkthrough | A guided walkthrough of the GFX map features. |
Nodes are the building blocks for GFX profiles. Nodes can be maps, devices, subsystems, or links to other subsystems.
With the cursor over the map view, you can bring up the context menu at any time by right-clicking the mouse. Bringing up the context menu on a node will allow you to modify various aspects oif the node. Below is a table of available context menu options.
| Option | Description |
|---|---|
| Edit Name | Changes the name of the selected node. This will be displayed as the node's label, as well as in the top right corner and on the monitor screen. |
| Copy | Copies the node and all of its contents. You're able to copy the node onto the same layer or into a different map layer |
| Move | Moves the node and all of its contents. YOu can move the node to the same layer (essentially not changing anything) or into a different layer. |
| Delete | Deletes a node and all of its contents. This is the same thing as using "Delete Node" in the menu bar. |
| Change Icon | Changes the icon for the node. See below for more information. |
| Level Down | Traverses to the map layer of the selected node. This is the same as double-clicking the node. |
| Launch URL | Launches a URL in a new browser tab when the node is set to a "Web URL" |
| History Report | Creates a history report for the selected node's alarms. Usable when node is set to Alarm Group, Device, or Device Subsystem and when in monitor mode. |
The currently available node types are listed below.
| Type | Description |
| Map Layer | (default) An additional map layer to the GFX profile. |
| Alarm Group | A node that contains all alarms within an alarm group. Any alarms within that group will be displayed by this node. |
| Device | A node that contains all alrms within a device. Any alarm from the device will be displayed by this node. |
| Device Subsystem | A subset of the device type above. This option allows the node to have a subset of alarms it will display. |
| Application | Allows the node to launch an application on the user's computer. More information below. |
| Web URL | Allows the node to launch a web URL. This option is handy if you want to quickly navigate to a device or server from GFX. |
Each node can have a custom icon if desired. Using the context menu explained above, you can select different icons or even upload your own.
It is recommended that icons are smaller than 52x52 pixels. This is the size of the default nodes. You can upload any JPG, PNG, BMP, GIF, or ICO file type. If at any time you want to revert back to the default node icon, you can select default_node.png.
Note: at this time, changing the node icon will change the icon for all severities. Meaning the node will not change based on the severity in monitor mode, but the severity will be displayed in the left-hand display of the GFX tree.
A node can be set up to launch an application on your computer. Doing so requires some additional setup, but that's what this article is for—to make the process quick and concise!
To get started, you will need to download the required launcher from your T/Mon. You can access the download by navigating to your T/Mon's IP address in a browser and adding "/apps/launcher.exe" to the end. This will immediately begin the download.
When the launcher is finished downloading, move the executable to a place where it can be run—most likely a folder with elevated permissions. Open the "launcher.exe" and confirm the access for registry changes.
With the launcher installed, you can set up application paths through the GFX profile. To do this,
The node will now launch an application on your PC. Ensure that other users who will use this feature also have the application in the correct folder.
Each profile has different settings that can be changed in both "Edit" and "Monitor" modes. However, "Edit" mode provides a few additional options that cannot be changed in "Monitor" mode.
The following table lists all available options for GFX profiles.
| Option | Description |
| Enable Node Labels | Toggles the option to see the node labels without selecting the node. |
| Disable Blink on Critical Alarm COS | Disables the icon blinking when a critical COS alarm is present in a child node. |
| Disable Blink on Major Alarm COS | Disables the icon blinking when a major COS alarm is present in a child node. |
| Disable Blink on Minor Alarm COS | Disables the icon blinking when a minor COS alarm is present in a child node. |
| Disable Blink on Status Alarm COS | Disables the icon blinking when a status COS alarm is present in a child node. |
| Disable Blink on Clear Alarm COS | Disables the icon blinking when a clear COS alarm is present in a child node. |
| Apoply Blink settings to sidebar | By default, any settings you apply to the general icons will be mirrored in the sidebar. Use this to separate the behavior of the sidebar and the icons. |
The following options are only avilable in "Edit" mode and only affect nodes that have default_node selected.
| Option | Description |
| Set default Critical Icon | Sets the default icon for critical alarms. |
| Set default Major Icon | Sets the default icon for major alarms. |
| Set default Minor Icon | Sets the default icon for minor alarms. |
| Set default Status Icon | Sets the default icon for status alarms. |
| Set default Clear Icon | Sets the default icon for clear alarms. |
Setting the default icon for any of the severities will bring up a dialog box where you can configure which icon you want to use for the severity selected. This will only affect nodes that are set to "default_node.png" as their icon. If you ever want to revert the icons back to the default, select "default_node.png" as the icon.
T/Mon is an advanced playform with intuitive features that help bring remote visibility to a central location. T/Mon GFX provides a graphical alarm representation, useful for showing things such as where remote sites are in relation to each other on a geographical map, or which rack an RTU is on and in which corner of the room.
We covered how to get started with GFX, create and edit profiles, create display nodes, and advanced profile configuration—the core of T/Mon GFX. Using this how-to and best practices guide, you can be on your way to proficiency with your T/Mon.
As always, if you have any further questions, feel free to reach out to our knowledgeable tech support team.

Julian Coleman
Julian Coleman is a Software Engineer at DPS Telecom. He is responsible for maintaining internal tool systems and improving website UX.