Download our free Monitoring Fundamentals Tutorial.
An introduction to Monitoring Fundamentals strictly from the perspective of telecom network alarm management.
1-800-693-0351
Have a specific question? Ask our team of expert engineers and get a specific answer!
Sign up for the next DPS Factory Training!

Whether you're new to our equipment or you've used it for years, DPS factory training is the best way to get more from your monitoring.
Reserve Your Seat Today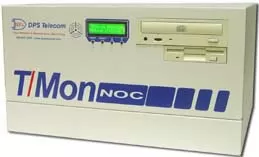
Nowadays, you can do anything with a cell phone - including receiving and acknowledging alarms from your T/Mon Remote Alarm Monitoring System.
More and more T/Mon users are choosing to receive email alarm notifications on their cell phones. This gives you detailed alarm notifications wherever you are, without your having to carry an extra pager.
And being able to acknowledge alarms from your cell phone makes it even better. NOC managers can immediately know that a tech is working on the alarm.
And it's easy to set up. Here's how you can quickly configure T/Mon to send email alarm notification directly to your cell phone, and how you can acknowledge them.
To send and receive email, T/Mon must be able to connect to a mail server via LAN. The mail server should support SMTP (for sending outgoing mail) and POP3 (for receiving incoming mail).
T/Mon needs an email account, a user name, and a password on your mail server. Contact your network administrator for assistance in setting up an account for T/Mon.
Once the email account has been created, T/Mon needs to be configured to access the account. Set up two virtual port LAN jobs to represent T/Mon's access to the SMTP and POP3 servers. For full instructions on configuring T/Mon for email access, see "Alarm Notification via email" in Section Seven of the T/MonXM User Manual.
Step Two: Define Email RecipientsEmail alarm recipients are defined in T/Mon's Pager Carrier list.
From the T/Mon Master Menu, choose Files > Pager > Pager Carriers to open the Pager Carriers screen. To add a new person to the list, find a blank entry and enter his or her initials and names. If your alarm recipients only want to receive email, you don't need to enter a pager number for them.
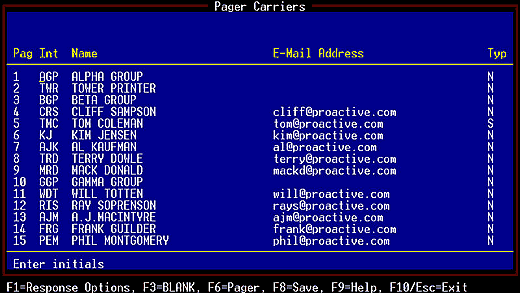
Now press F6 to access the Pager Carriers email list. Enter an email address for each person you want to send email to.
Step 3: Activate Ack by ReplyIf you want to acknowledge alarms from your cell phone, you need the correct response privileges.
Response privileges are defined individually for each email recipient. Select an email recipient and press F1. This accesses the Response Options screen, which looks like this:
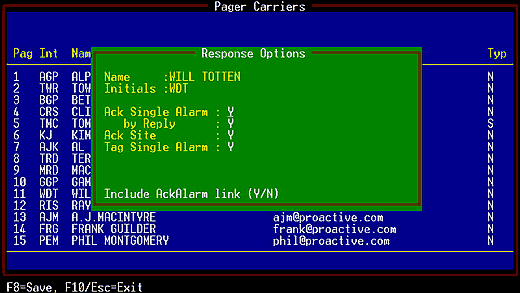
There are four response options for each email recipient:
The most convenient option for acknowledging cell phone alarms is Ack by Reply. This allows the recipient to acknowledge the alarm just by hitting "reply" and sending a blank email in response.
To activate this option, turn on Ack Single Alarm and Ack by Reply.
(Hint: If you don't want your email recipients to ack any alarms, turn all these options off.)
Before T/Mon can send email notifications, you must define the message format it will use.
Keep in mind - cell phones have small screens. Format your email alarms so they give the most information in the smallest space.
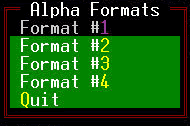
From the T/Mon Master Menu, choose File > Pager > Alphanumeric Formats. This will open the Alpha Formats submenu, where you can select one of four message formats to edit.
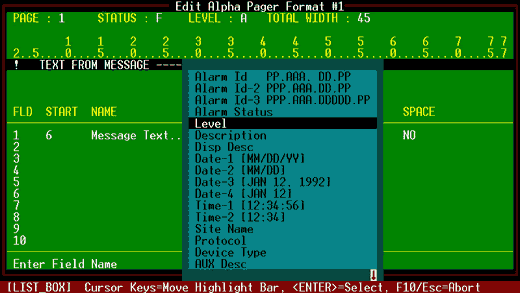
The alpha pager format lists the fields that T/Mon will fills for each alarm, such as Level, Description, Site Name, etc. The actual information that T/Mon places in these fields is specific to each alarm.
You can select up to 14 fields for each message format. To edit the format, select a field and press the Tab key to open a list box of possible fields. You can fill the message format with a little information or a lot, depending on how much detail you want the email recipient to see. You can define different message formats for personnel with different responsibilities and security clearances.
For a cell phone alarm, pick basic information like Level, Description, Site, Date, and Time.
It's very important to select the right character width for each field. Choose a narrow width to fit in a cell phone screen. But keep in mind that if the information for the field is longer than the selected width, the message will be truncated.
For full instructions on editing message formats, see "Alphanumeric Pager Formats" in Section Six of the T/MonXM User Manual.
Step 5: Assign Each Email Recipient to a Pager Operator, Schedule, and ProfileAssign each of your email recipients to a pager operator, schedule, and profile. These are successive steps that define which alarms are sent to the email recipients. For full instructions on assigning specific alarms to email recipients and pager carriers, see "Pager" in Section Six of the T/MonXM User Manual.
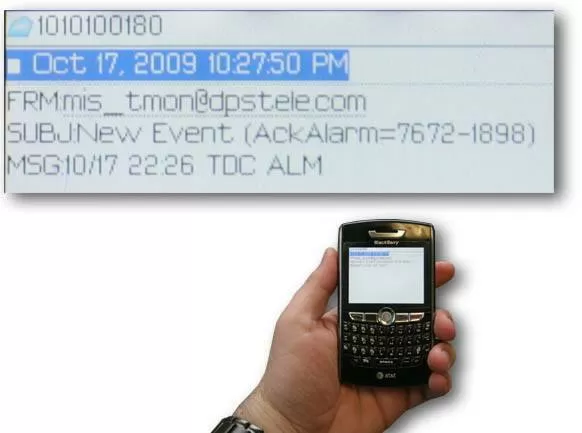
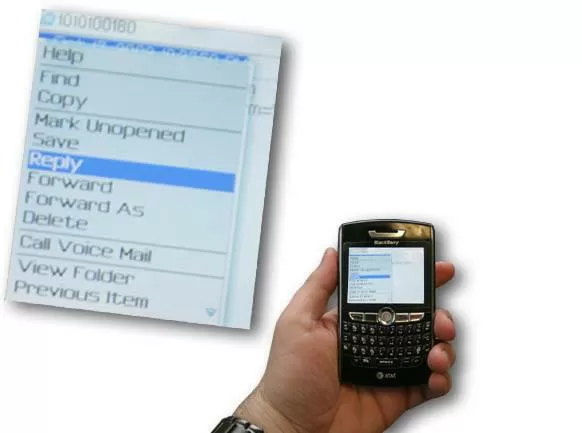
Step 6: Acknowledging Email Alarm NotificationsIf an alarm is sent to your cell phone, you'll get a text message that looks like this:

Send Email Notification for Any Alarm with T/Mon NOCT/Mon NOC adds advanced alarm monitoring capabilities for your whole network. T/Mon supports over 25 protocols, and easily mediates legacy alarms in E2A, TBOS, TABS and proprietary protocols to SNMP or TL1.
T/Mon NOC gives you complete visibility of your legacy alarms, plus email notification on every alarm, upgrades to SNMP and ASCII, nuisance alarm filtering, and more
See Full Specifications of the T/Mon NOC Remote Alarm Monitoring System
To receive a price quote or ROI analysis...
Call 1-800-693-0351