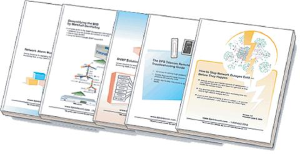
Check out our White Paper Series!
A complete library of helpful advice and survival guides for every aspect of system monitoring and control.
1-800-693-0351
Have a specific question? Ask our team of expert engineers and get a specific answer!
Sign up for the next DPS Factory Training!
Whether you're new to our equipment or you've used it for years, DPS factory training is the best way to get more from your monitoring.
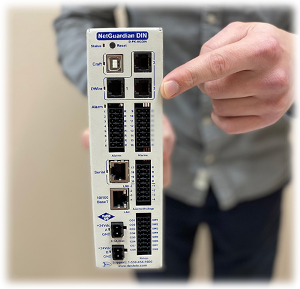
Reserve Your Seat TodayNot every company has the budget to have a permanently manned 24-hour Networks Operations Center (NOC). However, if you have a T/Mon master station, then you already have a more effective solution for 24x7 monitoring.
Paging, emails, and text messages take network alarm monitoring to wherever you are - they can reach you in your car, at remote sites, or even at your home. You'll know for sure that that you'll be notified if problems happen at any time.
Notifications via pager, email or text message is a standard feature on T/Mon. You can tailor the alert to reach the proper person, at the right time for the proper alarm. This provides you with visibility to identify the exact problem area and to take the corrective actions in a timely-manner.
So, let's take a look at how you can set notifications on the T/Mon so you can get the most out of this feature.
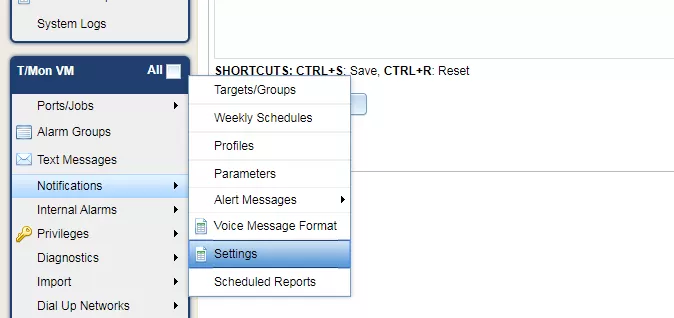
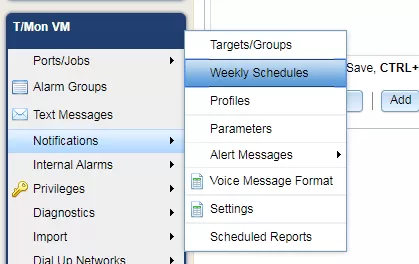
1. Login into your T/Mon's Edit menu.
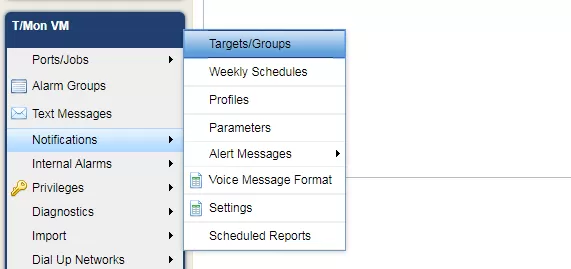
2. From there, click on Notifications and then click on Settings.
3. In the Email Notifications tab, fill in the blank spaces with your email server information.
The minimum information you need to provide is the Description (your IP or mail server name), the port, and a from address.
If your mail server requires authentication, then click on the checkbox and provide an Account Name and Password.
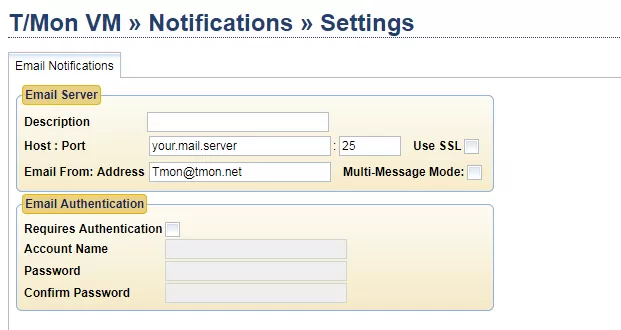
4. Hit the Save button.
5. After you save your email notification settings and you have the mail server, go to Notifications in the left-handed side menu and select Targets/Groups. There you'll enter who will get the notifications.
6. Click on Add on the bottom of the screen. A new Id will show up in the list above.
After that, you fill in the Inits (the person's initials, so it has to be 2 to 3 letters), Name (the person's name, it can also be more descriptive such as an email or phone number). Type stays as Email, and you can skip Phone, Delay and Pin. And in Email/Members you enter the actual email of that person.
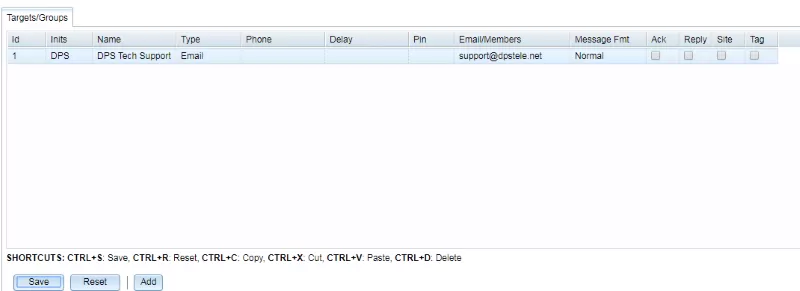
7. Once you finish entering the email, you can click Save. Now they are able to be sent messages.
8. If you want to test this, simply go to Monitor, then in Notification Processor click on Notification Test.
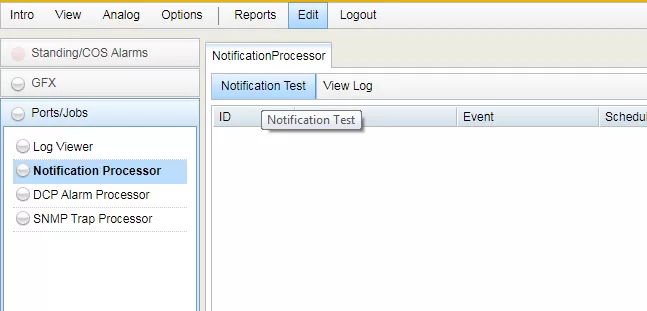
9. In the Notification Test menu, choose the person under Target and Add to queue. This will send them a test notification.
This is a good way to test to make sure your mail servers and your credentials are working, and the person that you set up will actually get the notification email - this way you don't have to wait until an alarm gets in to see if your notifications are actually working.

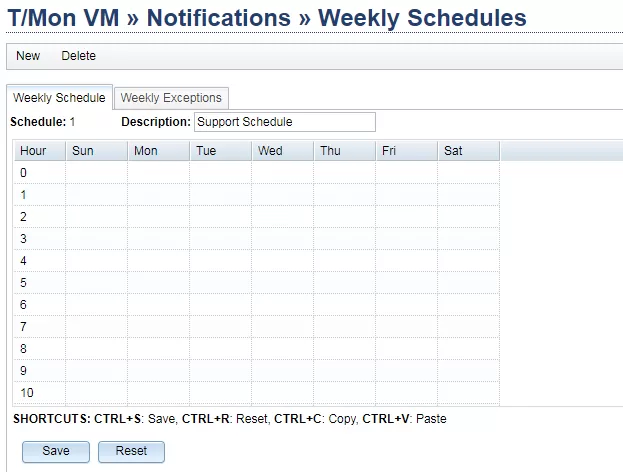
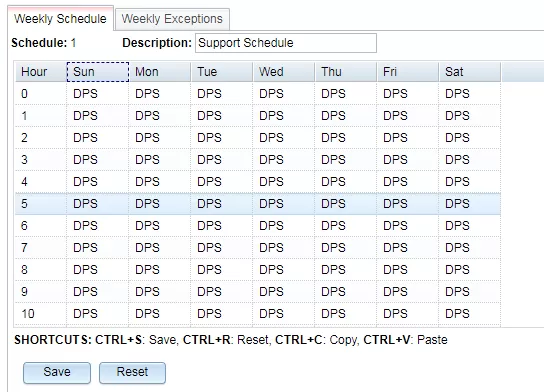
10. Once you created a Target/Group, you can go to Weekly Schedules in the Notifications menu.
11. The schedules are essentially when do you want these notifications to be sent out.
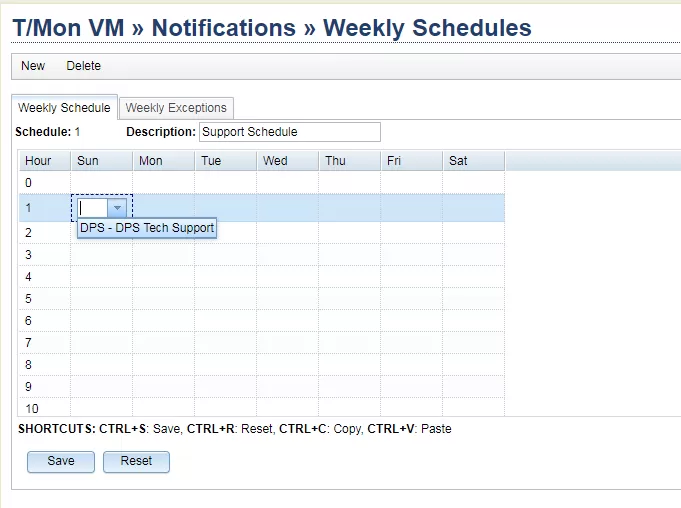
12. So, you are given a grid with the hours of the day (it goes from midnight to 11 PM). Every block is from 00 minutes of that hour to 59 minutes of that hour.
13. You could go into every single block to enter who you want.
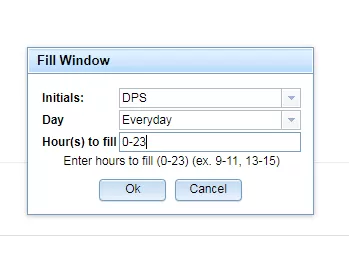
14. Or you could just right-click and go to Fill.
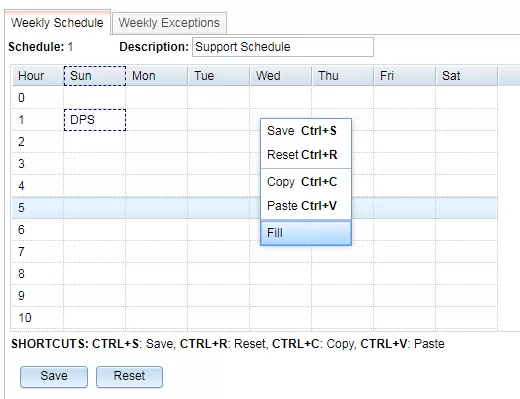
15. There, you can enter the Initials of who you want, when do you want the notification to be delivered, and how many hours to fill of that day.
16. After that click Save on the Weekly Schedule tab.
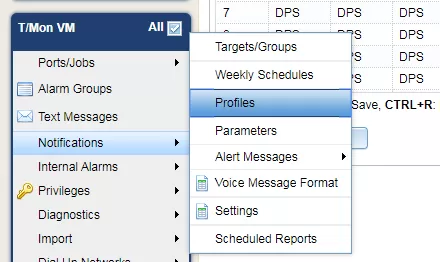
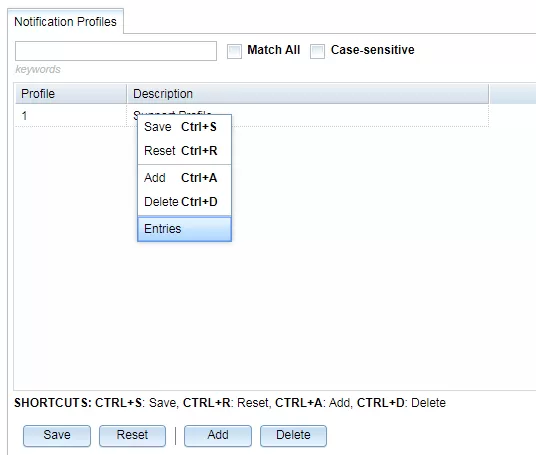
17. Once you've done that you can go to Profiles in the Notifications menu.
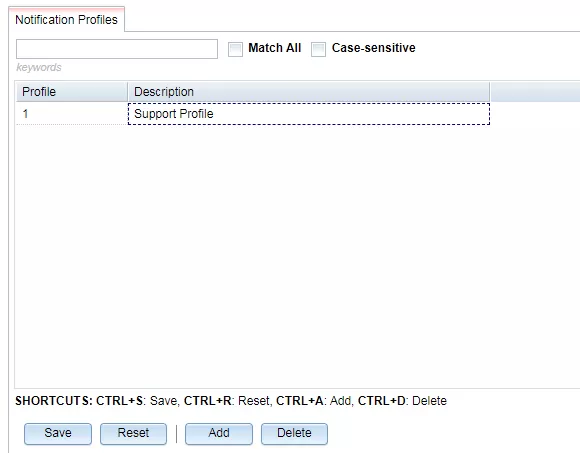
18. In the Notification Profiles tab, select Add to add a new notification profile. Then give it a description.
19. Right-click on your profile and select Entries.
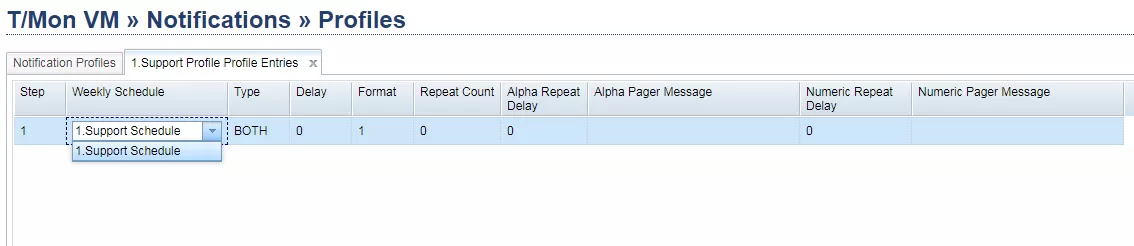
20. In the new tab Profile Entries tab, you can set up certain details.
Weekly Schedule column lets you set the schedule for each row. Keep in mind when you are setting it up that the row order does matter, that is why the first column is called Step.
In the Type column you can choose if you want to get an alarm notification in alarm, clear, or both states.
Also, for example, you want alarms to be registered in the T/Mon but you don't want to get an email unless it's been there for maybe 5 or 10 minutes. You can set this up in the Delay column in the Profile Entries. You'll still get the alarm once it happens but the alarm will only be delivered to you after a certain time.
21. Once you have a Profile set up, you can go to any device you have set up in T/Mon and you can apply that profile to any individual alarm point.
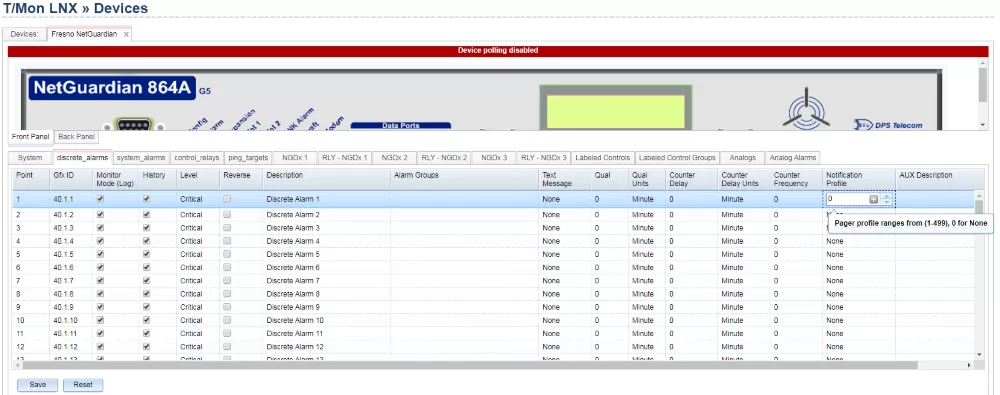
22. Go to Notification Profile column. There, you'll put in the number for the profile you want or you can click on the plus button to so you can see all the notification profiles (to be able to figure it out which one you want to use).
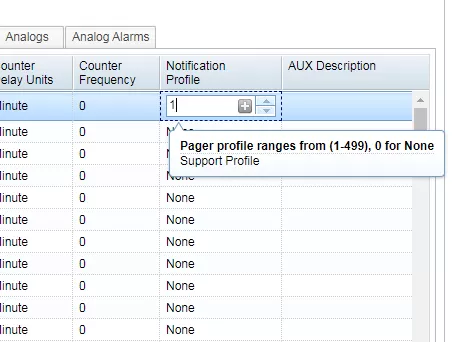
23. Once you selected a notification profile, hit Save. Now anytime that an alarm comes in, you'll also the notification profile applied to it.
If you ever need to add another person, remember to follow the order of the Notifications menu: Targets/Groups, Weekly Schedules and Profiles.
If you have any questions, any concerns, we are here to help you.
We help people solve their network monitoring problems every day, so we understand the challenges you face. Our philosophy is that we should do more than just help you when problems arise. We work proactively to support you at every stage of your network monitoring: system design, implementation, and daily use.
Our team also writes techno-knowledge guides that cover dozens of commonly requested topics about our products. They are written in a simple to understand manner that will take you through the complete process of setting up the feature desired. There are many guides available to download for free in MyDPS - simply login into your account or signup.

Morgana Siggins
Morgana Siggins is a marketing writer, content creator, and documentation specialist at DPS Telecom. She has created over 200 blog articles and videos sharing her years of experience in the remote monitoring industry.