Check out our White Paper Series!
A complete library of helpful advice and survival guides for every aspect of system monitoring and control.
1-800-693-0351
Have a specific question? Ask our team of expert engineers and get a specific answer!
Sign up for the next DPS Factory Training!
Whether you're new to our equipment or you've used it for years, DPS factory training is the best way to get more from your monitoring.
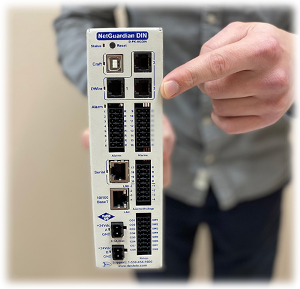
Reserve Your Seat TodayDiscrete inputs are among the most important parts of your RTU (meaning Remote Terminal/Telemetry Unit) input capacity. In fact, in decades past, discrete inputs were sometimes the only inputs.
So what is a "discrete input"? It's a way for an RTU unit to accept binary on/off data from other devices or sensors. The first of the two pins are wired into the other device/sensor, then the return is wired to the second pin. The RTU is then able to detect the presence or absence of voltage across the wire.
In the common "dry contact" configuration, the input on the RTU is expecting to be wired into a dry contact closure (the circuit is closed, but no electricity is provided). In this configuration, the first ("output") pin of the discrete input has electric potential (typically +5 volts DC) that is detected by the second ("ground") pin when the contact relay output is closed.
Other "wet" configurations require the output device to emit some amount of electrical current/voltage.
Devices with discrete alarm outputs (to connect to your RTU's inputs) include generators, switches, rectifiers, and just about any other piece of industrial-grade equipment in your network. Most pieces of gear will have multiple outputs, representing different conditions. A generator, for example, might have separate outputs for "running", "low fuel", and "failure". Some electronic devices today are more focused on SNMP an other protocol-based communication, but it's tough to beat the simplicity and reliability of physical discrete I/O.
In other cases, you won't have a device that's outputting alarm conditions, but rather a sensor that's synthesizing a discrete output from the conditions it measures. A magnetic door sensor in a security system, a thermostat, and a floor-water detector are all examples of discrete-output sensors. They can't tell you "how much" (ex. the precise temperature), but they will tell you whether you have a problem.
There's no magic answer to this question, as every network site is different.
Your RTU's capacity should satisfy the following 3 rules:
Also, don't be obsessive about exactly matching every site's requirements. Your RTU fleet may need to cover dozens, hundreds, or even thousands of sites. Some amount of tailoring is worthwhile, but too much will cause a headache.
Imagine that you have 100 sites, each with discrete-input requirements ranging from a mininum of 3 to a maximum of 59 inputs per site. Choosing to standardize on 3 RTUs (ex. with 8, 32, and 64 inputs each) is better than deploying dozens of different models in an attempt to achieve an absolutely "perfect" fit.
Consider the support, training, sparing, and purchasing hassles that grow as you add more and more different RTU models to your fleet. There is a point of diminishing returns here, as there is with everything.
There is no definitive standard for wiring termination of discrete inputs, as the only requirement is two conductive pins. Still, there are several common methods.
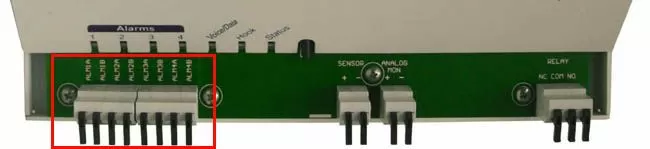
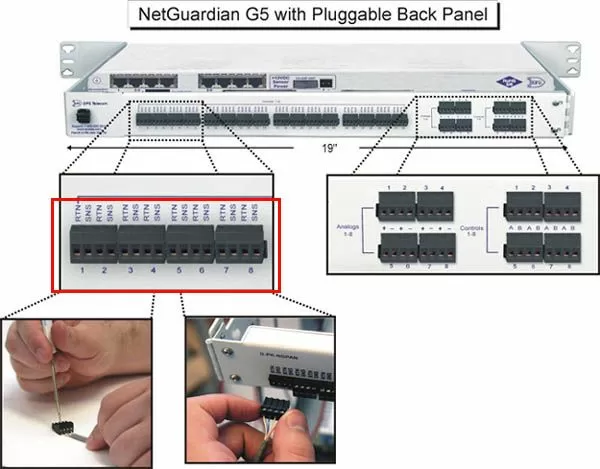
If you have just a few inputs on an RTU, "piano style" locking connectors can be ideal. You don't even need a screwdriver to use these inputs. Just flip up the lever, insert an end of stripped wire (within a fairly broad range of AWG diameters), and flip the lever back down.
If you're a telco, you probably value wire termination that will last for a decade or more without ever coming loose. "Wire wrap" involves wires tightly wrapped around individual posts on a dense panel. The posts are spaced so that no stripped wires are allowed to contact one another.
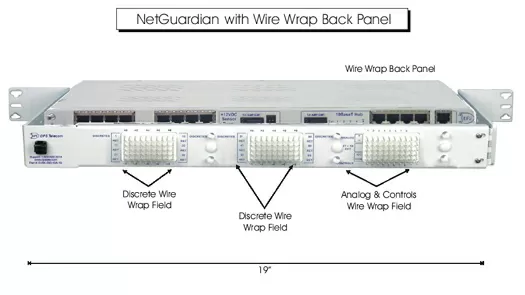
A significant investment of time (at least a few man-hours) is required to initially wire up an RTU wire-wrap panel, but the connections can be trusted to last for a very long time.
If you have a lot of wire-wrapping to do, it won't take long for a $200 USD wire-wrap "gun" tool to pay off. With a wire-wrap gun, you simply push the stripped wire into the muzzle, push the muzzle down over the wiring post, and pull the trigger. When you lift the gun away, the wire will now be tightly wrapped to the post.
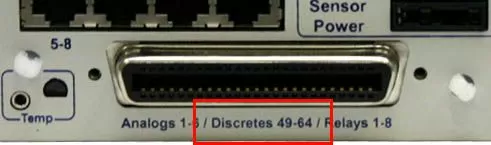
Another common termination type is the 50-pin amphenol connector. These are common on RTUs with 16-64 discrete inputs. Wiring to the amphenol connector is via soldering iron or by simple splicing to bare wires pre-soldered to the connector.
Finally, some companies prefer a pluggable panel for alarm termination. This is similar to wire wrap, but the initial wiring time is significantly shorter.
5 Benefits Remote Monitoring Can Bring to Your Organization
Why the Right Master Station for Your SCADA System Is Critical for Your Bottom Line