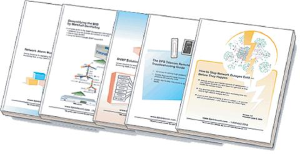
Check out our White Paper Series!
A complete library of helpful advice and survival guides for every aspect of system monitoring and control.
1-800-693-0351
Have a specific question? Ask our team of expert engineers and get a specific answer!
Sign up for the next DPS Factory Training!
Whether you're new to our equipment or you've used it for years, DPS factory training is the best way to get more from your monitoring.
Reserve Your Seat TodayIf you have mission-critical electronic devices at remote locations, being able to keep an eye on their status from wherever you are is critical. That's where monitoring systems come into play.
The starting point of any remote monitoring system is the sensors you will be using. Sensors are responsible for collecting the equipment data that ultimately will be sent to you. So, deploying different kinds of sensors allows you to have a complete picture of what's going on with your network - 24 hours a day.
Knowing how to install and configure sensors for the first time is the first step to achieve monitoring efficiency. If you don't do it right, you might lose visibility over your important equipment - sometimes without even realizing it.
In this article, you'll learn how you can properly hook your sensors up and perform the initial setup.
The types of sensors you will use will depend on exactly what you need to monitor. But here's a list of the ten most important sensors that most companies rely on to monitor conditions and to keep their network up and running:
At DPS, we make all the previous sensor types. But, of course, not all the previous sensors will be applicable to your unique scenario. That's why, if you have an application for a sensor that we don't currently make, we will work with you to design and make custom sensors that will attend your requirements.
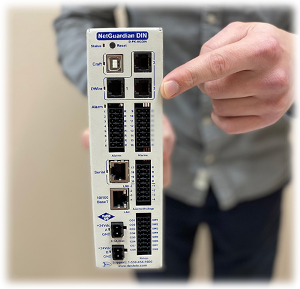
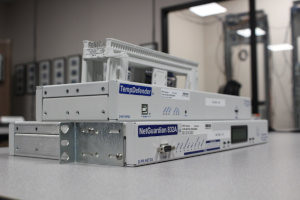
For the purposes of this article, we'll be talking about how to install our daisy-chainable sensors to your RTU (in this case, a TempDefender G2). Our daisy-chainable sensors are called D-Wire Sensors, and they are a great way to expand the capabilities of your RTU.
The D-Wire are small, bus-powered RJ12 sensors, making them easy to set up. And when connected to your DPS device, supported sensors are almost completely auto-configured.
When daisy chaining your sensors, you can have up to 600 feet across up to 16 sensors on a single strand.
First of all, log into your TempDefender web interface. By using this interface, you'll be able to configure your sensors, set up thresholds, and perform all kinds of sensor settings. We start by accessing the default IP address of the TempDefender in your web browser - 192.168.1.100. There, you'll get a login prompt. The username will be "admin" and the default password will be "dpstelecom".

Make sure to change your login information once you get your system set up.
When you log in, click on the "Provisioning" green button on the left-hand side of your screen.
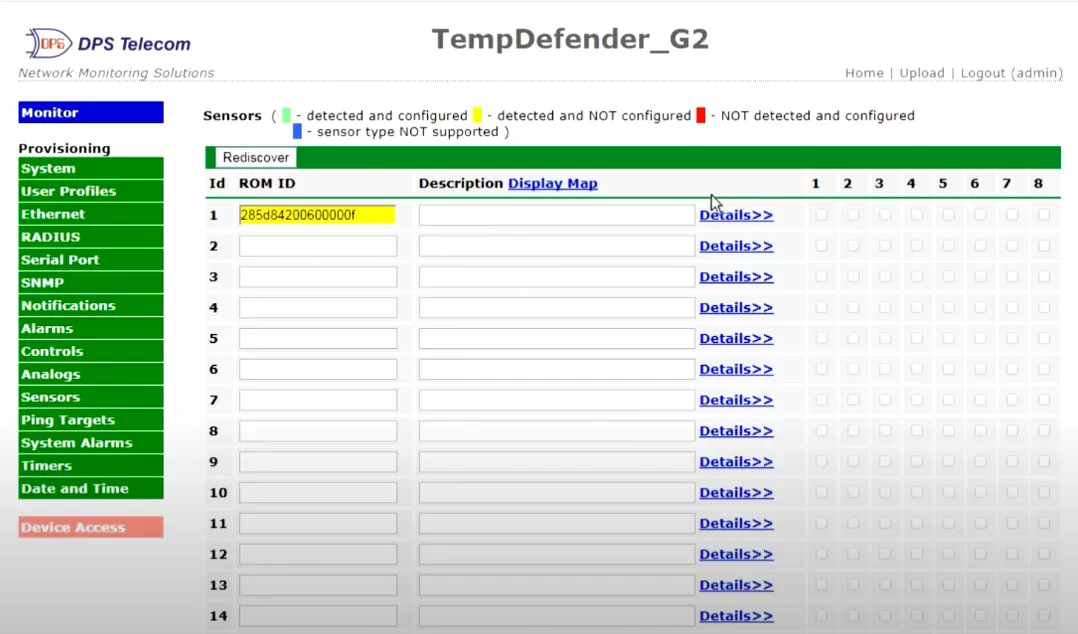
From there, find the green button called "Sensors" also on the left-hand side of your screen. This will take you to a list of sensors connected to your device. Even though we haven't plugged in any sensors yet, you'll see a sensor in the list already. This is the TempDefender's built-in internal sensor.
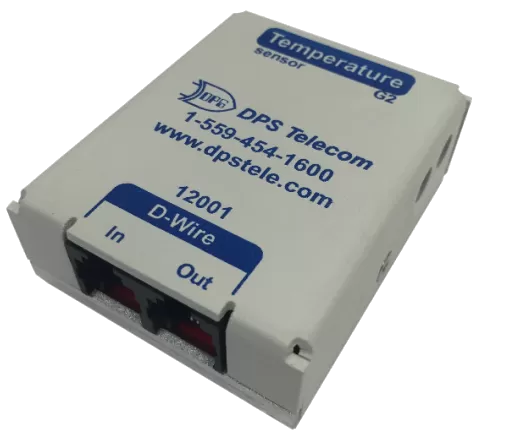
The cables used for the D-Wire sensors are very telco simple cables - they are J11 or J12 types.
First of all, plug one side of your cable into the TempDefender's port (this RTU has four D-Wire ports) and plug the other side into the In port of your sensor.
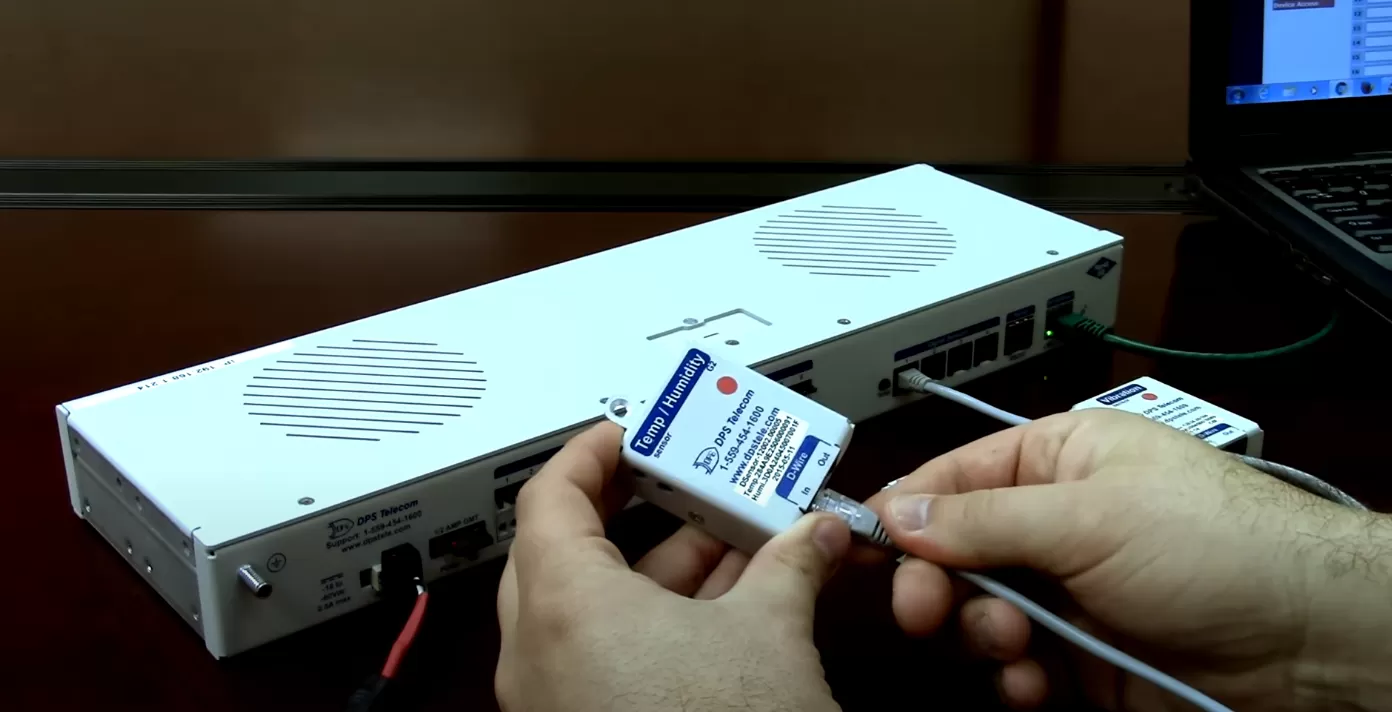
To daisy chain your sensors, simply connect a cable between the Out port of the D-Wire that is already linked to the RTU and the In port of the new D-Wire you want to connect. Then, after that always start plugging the cable in the Out port on the previous sensor to the In port of your new sensor.
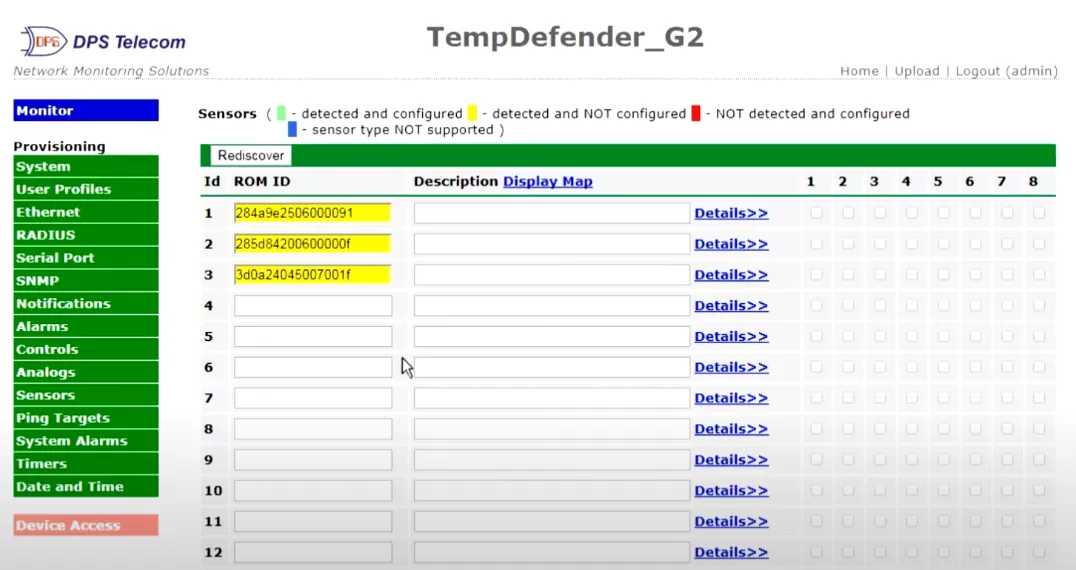
Back in the web interface, click on the "Rediscover" button. You should see your connected sensor in the list. Keep in mind that you have two sensors in one, such as Temp/humidity or Temp/airflow, you'll see two new sensors in the list.
When you open up the details for your newly connected sensor, you'll see that the sensor type is auto-detected by the RTU. The TempDefender knows automatically which kind of sensor is plugged in.
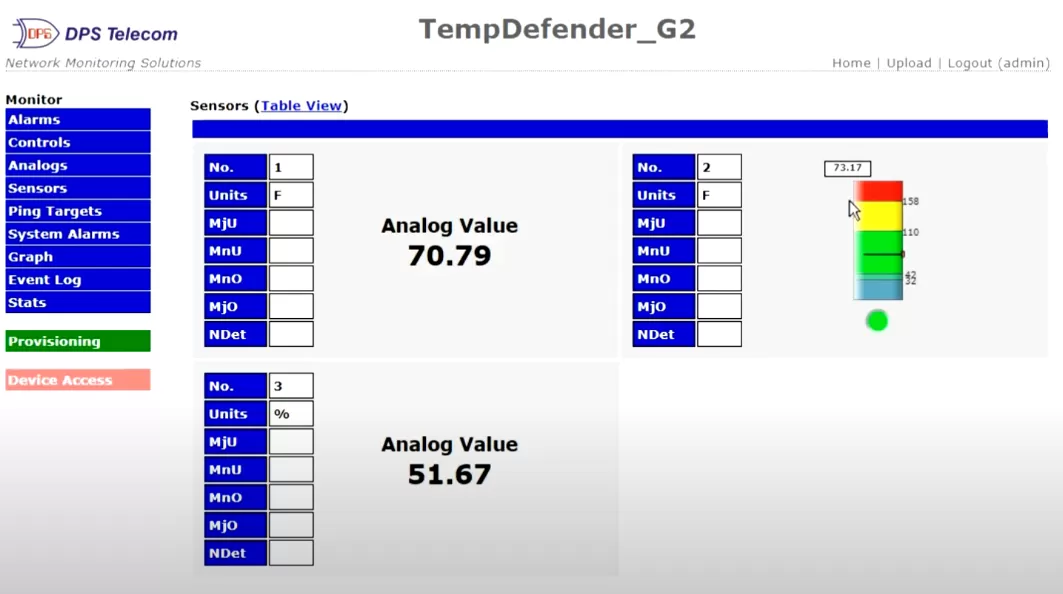
You'll also see that the thresholds are automatically filled in as well - you will see: 32F, 42F, 110F, and 158F. The MnU (minor under) and MnO (minor over) are what we call yellow alerts, they basically mean that something is becoming a problem. MjU (major under) and MjO (major over) mean that serious problems are happening and you need to respond to them quickly.
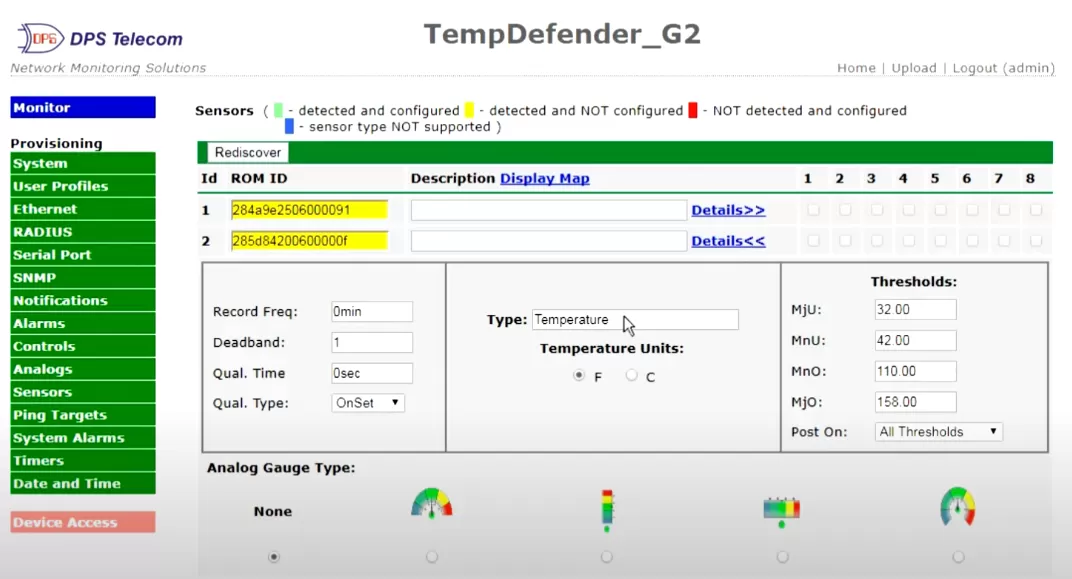
You can change your thresholds values to whatever makes sense to your network.
Also, notice that you can change the analog gauge type that will display your monitoring information. After making all the configurations you'd like, click on Save at the bottom of the page. Then click on the Device Access menu on the left-hand side of the screen, and go to Write (required) - this will right the settings changes to the unit.
In the blue Monitor menu on the left-hand side of the screen, click on Sensors. There, you'll see the sensors monitoring information through gauges or through a simple analog value - if you didn't set up a gauge.
In a nutshell, D-Wire sensors are a great way to expand the capabilities of your RTU. These sensors are very popular among products due to various reasons, such as:
Most network managers that need to monitor environmental levels in their facilities, choose to pair the D-Wire sensors with the TempDefender. This is because by deploying this RTU, you will immediately gain the following benefits:
Do you want to know more about our D-Wire sensors and RTU options? If you have particular monitoring needs that the sensors listed in this article can't satisfy, contact us and talk to our experts. With in-house design and manufacturing, we can offer custom products made specifically to your specs, this way you can achieve a perfect-fit solution.

Morgana Siggins
Morgana Siggins is a marketing writer, content creator, and documentation specialist at DPS Telecom. She has created over 200 blog articles and videos sharing her years of experience in the remote monitoring industry.